Your subscriber opens an email that greets them by name, shows them the exact product they browsed last week, and counts down the hours left on an offer built just for them. Then they open the next one from a different brand. “Dear Valued Customer.” One of those emails gets a click. The other gets deleted before the second line.
That gap is the whole game. And most brands are still landing on the wrong side of it.
Drop dynamic, real-time images directly into your email campaigns
Pinpointe has joined forces with NiftyImages, an online tool that delivers personalized images with real-time data, so you can close that gap without a developer and without a redesign. This post walks through how to build a personalized image in NiftyImages and drop it straight into your Pinpointe campaign.
But first, let’s define dynamic content and explain why it’s important.
What is dynamic email content?
Dynamic email content is any piece of an email that changes based on a subscriber’s preferences, behaviors, or data collected. Dynamic content gives brands the ability to send an email to a group of people, but tailor each email to create a personalized experience.
For example, you might send an email to your loyal customers about an upcoming sale, but add the customer’s name and nearest store location to provide a personal touch.
While the email might be sent to hundreds of loyal customers, each message feels like a one-to-one connection because of the two pieces of personalized information.
Why is dynamic content important?
The biggest reason marketers rely on dynamic content is to boost response rates, but there are many perks to creating this kind of content.
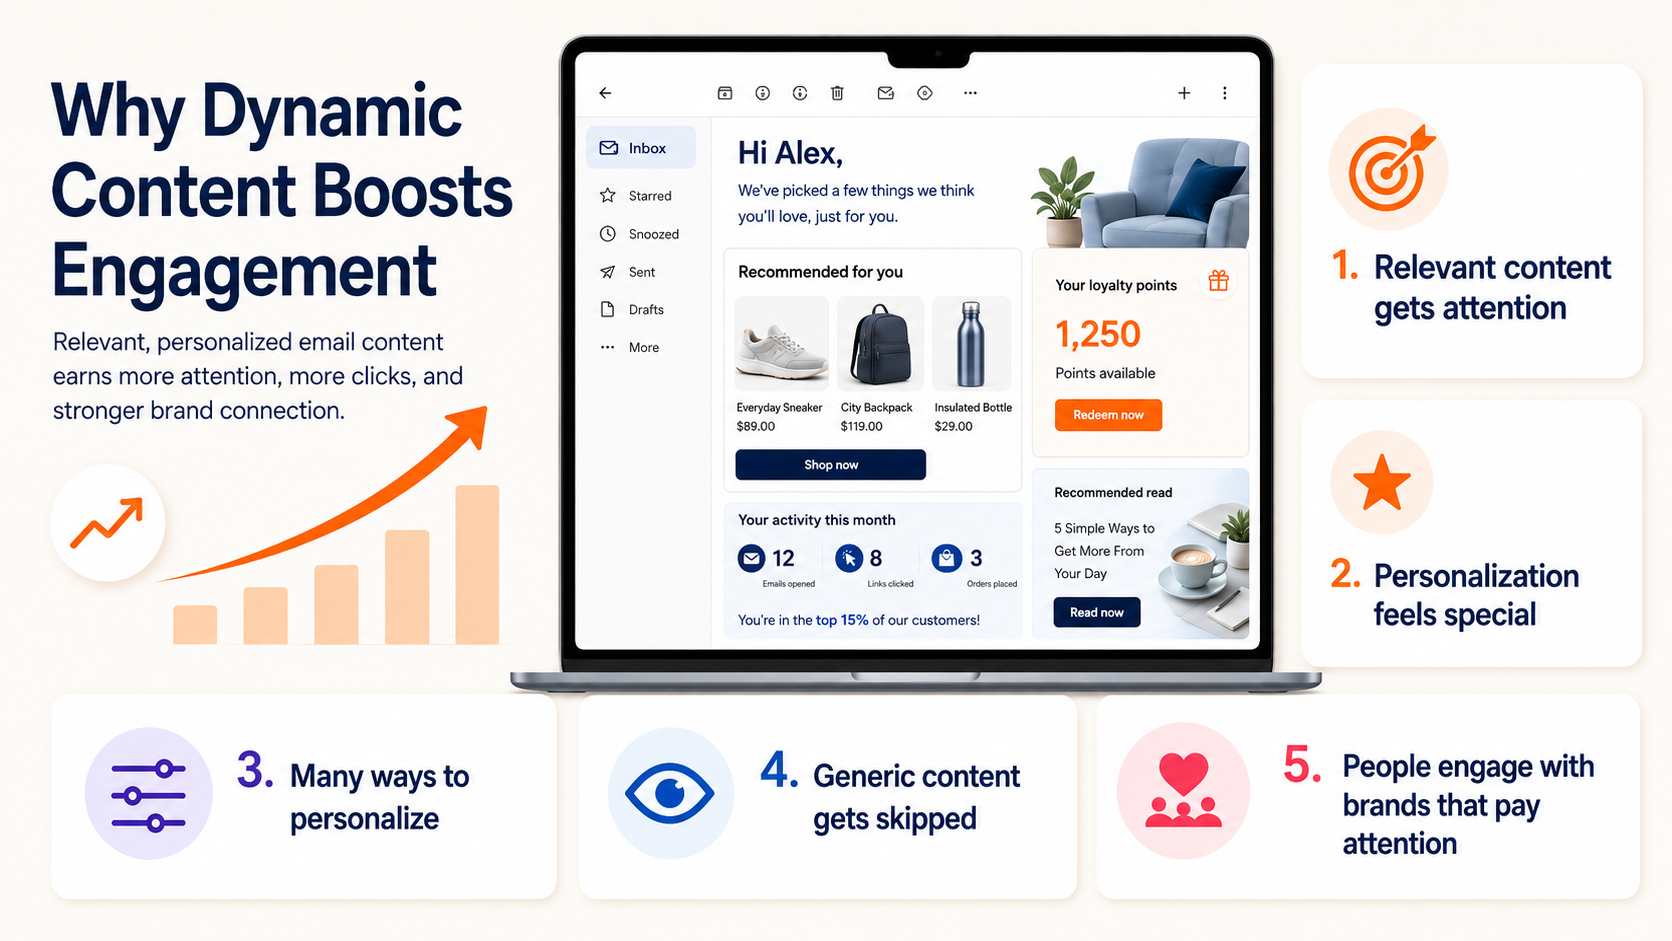
Subscribers are more likely to engage with personalized, highly relevant content
Content that’s relevant to a subscriber is more interesting. It’s that simple. When you can pique a person’s interest, they engage with the content and with your brand.
Everyone likes to feel special
A generic email doesn’t evoke much of a response, but an email based on customer data that provides a personal connection makes the reader feel special.
Every marketer and sales representative is ultimately working to create a connection, and personalized emails can help.
There are so many ways to personalize messages
Personalization can go far beyond a person’s first name. Marketers can personalize A LOT within one email. An email could provide product recommendations based on previous purchases, personalized use statistics for a certain online tool, the number of loyalty points earned for a recent purchase. The possibilities are endless.
Relevant content gets read, generic content gets skipped
When a message matches what someone cares about, they stop scrolling. When it doesn’t, it blends into the pile of everything else fighting for that same inbox.
That’s the entire mechanism. There’s no trick underneath it. You earn the read by being relevant, or you lose it by being noise.
People engage with brands that pay attention
Every marketer is ultimately trying to build a connection. A one-size-fits-all email works against that. A personalized one works for it.
This isn’t a soft, feel-good point either. Attention is the scarcest thing in the inbox, and dynamic content is how you signal you’re worth some of it.
The Data Behind Dynamic Content
Email personalization stopped being a nice-to-have a while ago. 76% of buyers now expect brands to treat them personally, which means a generic blast doesn’t just underperform. It tells your subscriber you weren’t paying attention.
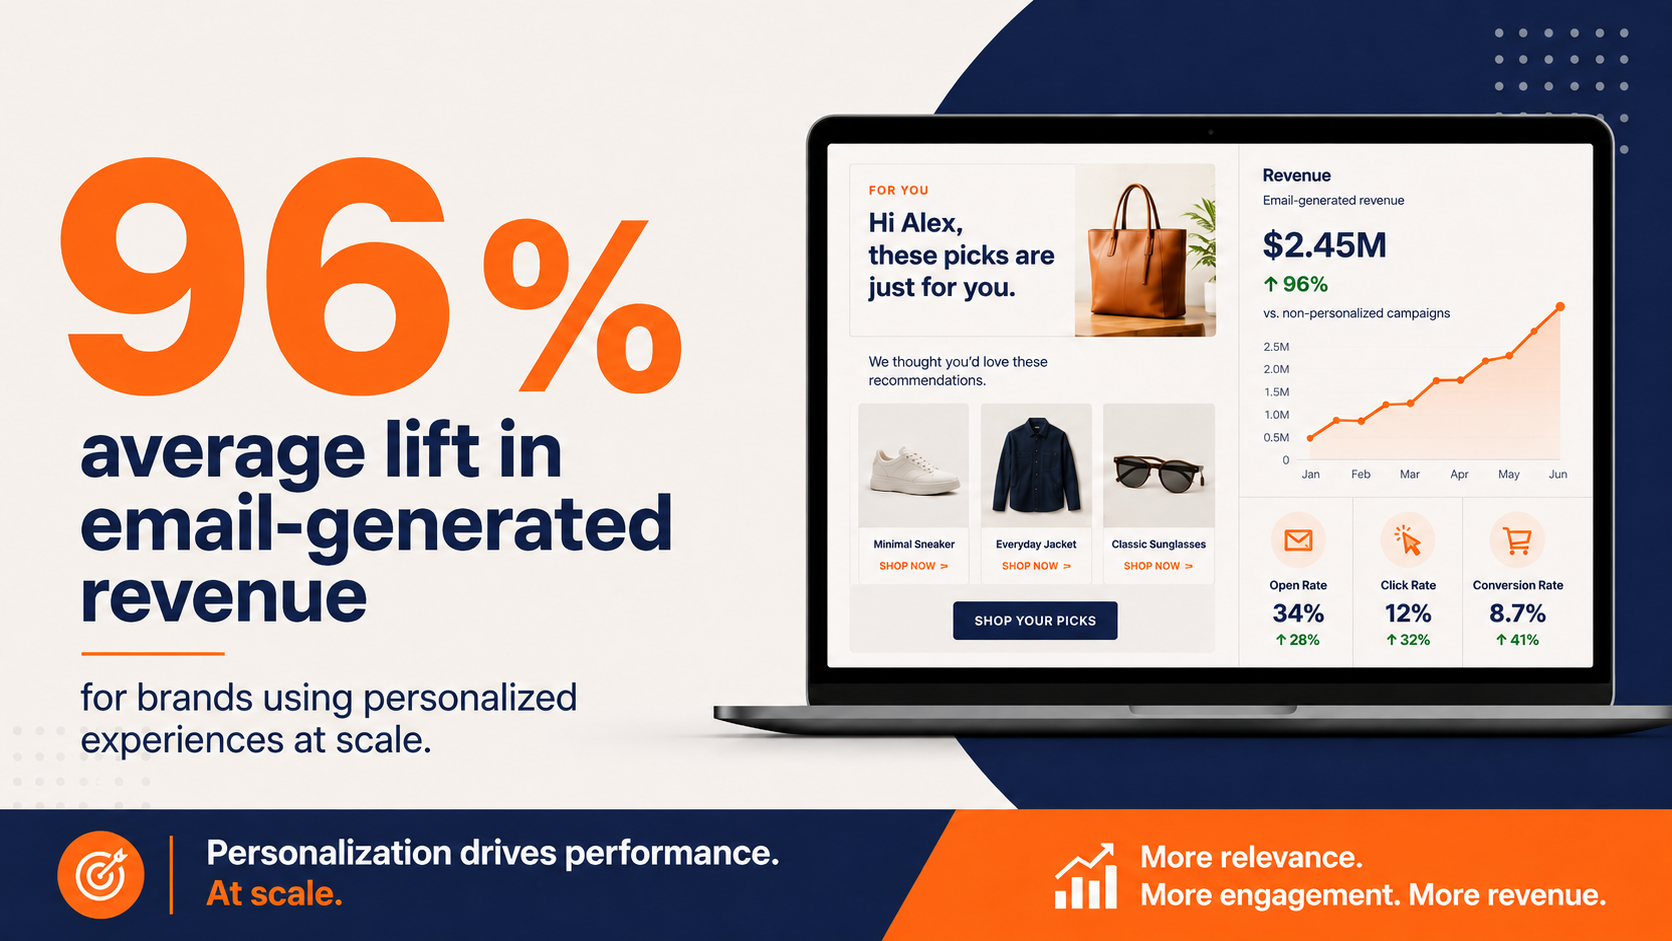
That expectation shows up in the numbers. Brands using personalized experiences at scale have seen an average 96% lift in email-generated revenue. That’s the difference between a channel that pays for itself and one that carries your quarter.
Here’s the part most teams miss. That lift traces back to relevance, not to fancier design. When the content matches what someone actually cares about, they read it. When it misses, it becomes inbox wallpaper.
Where the revenue actually hides
The instinct is to personalize the obvious stuff first, a name in the subject line, a logo swap. That’s fine, but it’s the floor, not the ceiling.
The bigger wins live in behavioral data. What someone clicked. What they browsed. What they bought last time and haven’t touched since.
A personalized image that reflects that behavior does the heavy lifting a first-name merge tag never could.
Why behavioral imagery outperforms simple name greetings
Think about the difference in practice. A first-name greeting tells a subscriber you have their contact record. An image that shows the product they looked at twice last week tells them you noticed what they wanted. One is data entry. The other is attention, and attention is what people actually respond to.
Email Segmentation Is What Makes Personalization Work
You can build the most beautiful personalized image in the world, and it’ll still flop if it lands in the wrong inbox. Email personalization and segmentation are two halves of the same job. One decides what the message says. The other decides who should get it.
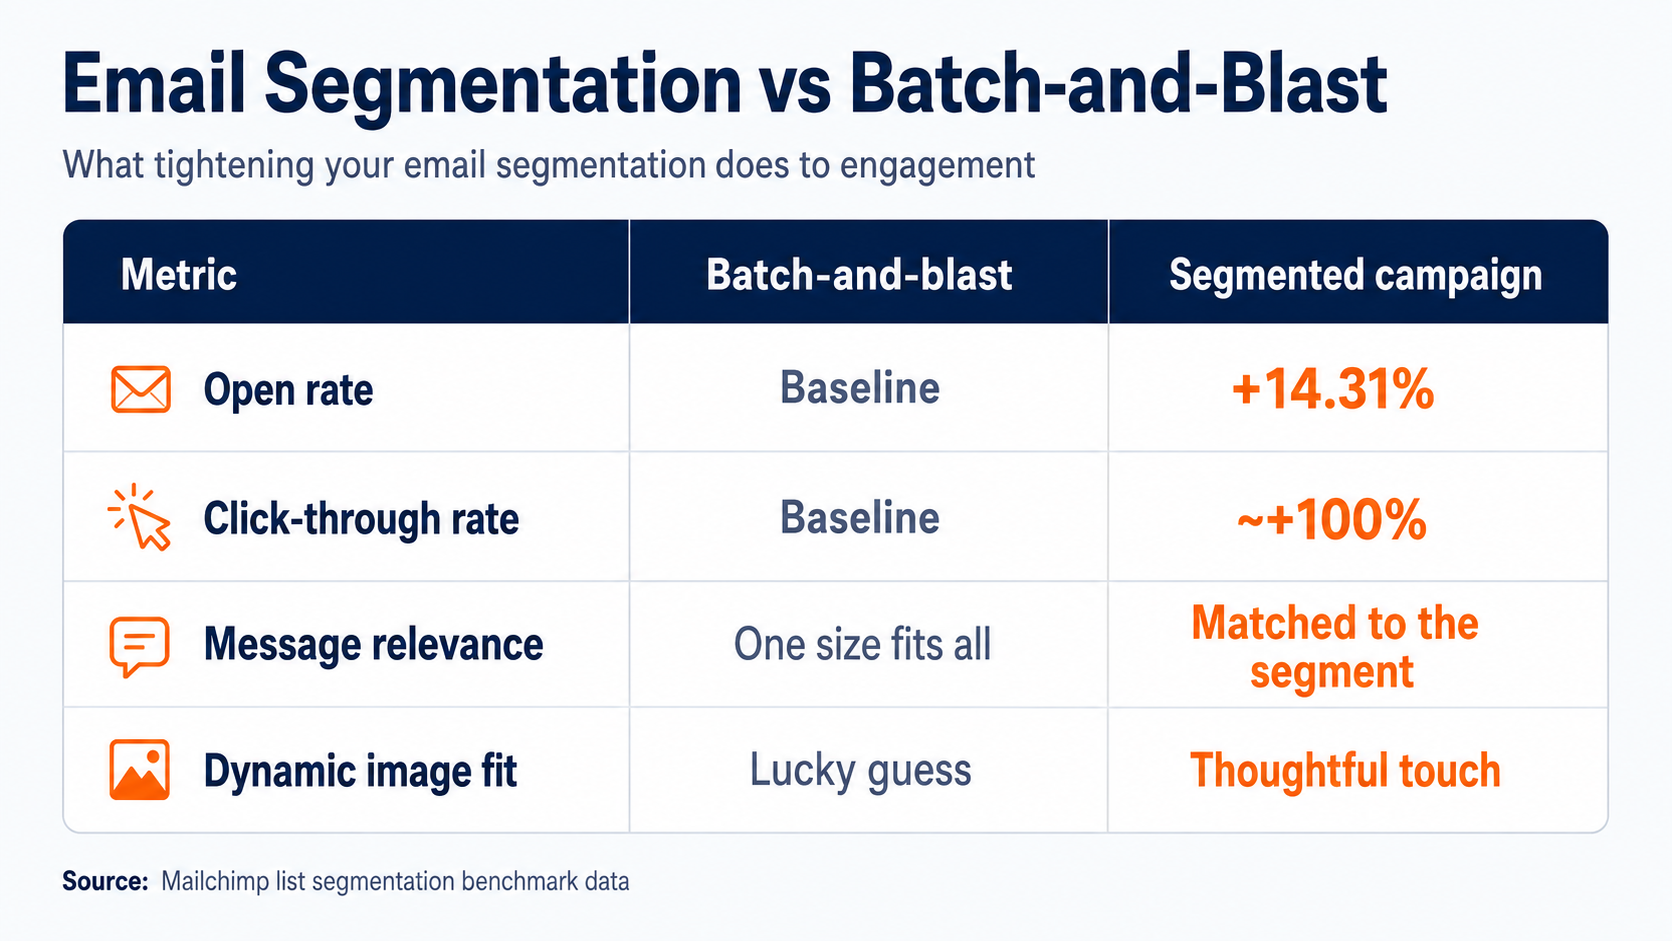
The data backs this up hard. Segmented campaigns pull 14.31% higher open rates and roughly 100% higher click-through rates than the batch-and-blast approach. Same list. Same product. The only variable is whether the right people got the right message.
So before you drop a dynamic image into a send, ask who it’s actually for.
A 15% off coupon aimed at your most loyal buyers reads differently than the same coupon aimed at someone who hasn’t opened an email in four months.
Match the image to the segment, not the whole list
A birthday image goes to people with a birthday on file. A win-back image goes to your quiet subscribers. A product recommendation goes to people whose browsing history gives you something to recommend.
The tool renders the image. Your segments decide whether it lands as a thoughtful touch or a lucky guess.
Keep your email segmentation tight and every dynamic image you build works harder.
Start with the segments you can actually build today
You don’t need a data science team to segment well. You need to look at what you’re already sitting on.
Engagement is the easiest starting line. Split active subscribers from people who’ve gone quiet, and you can send confident offers to one group and re-engagement to the other.
Purchase history is the next layer. First-time buyers, repeat buyers, and lapsed customers each want a different message, and each one supports a different dynamic image.
Then there’s demographic and location data, which most lists already carry. A store-nearest-you image or a region-specific offer takes almost no extra work once the field exists.
The point isn’t to build every segment at once. Pick the one that maps cleanest to a message you already want to send, and start there.
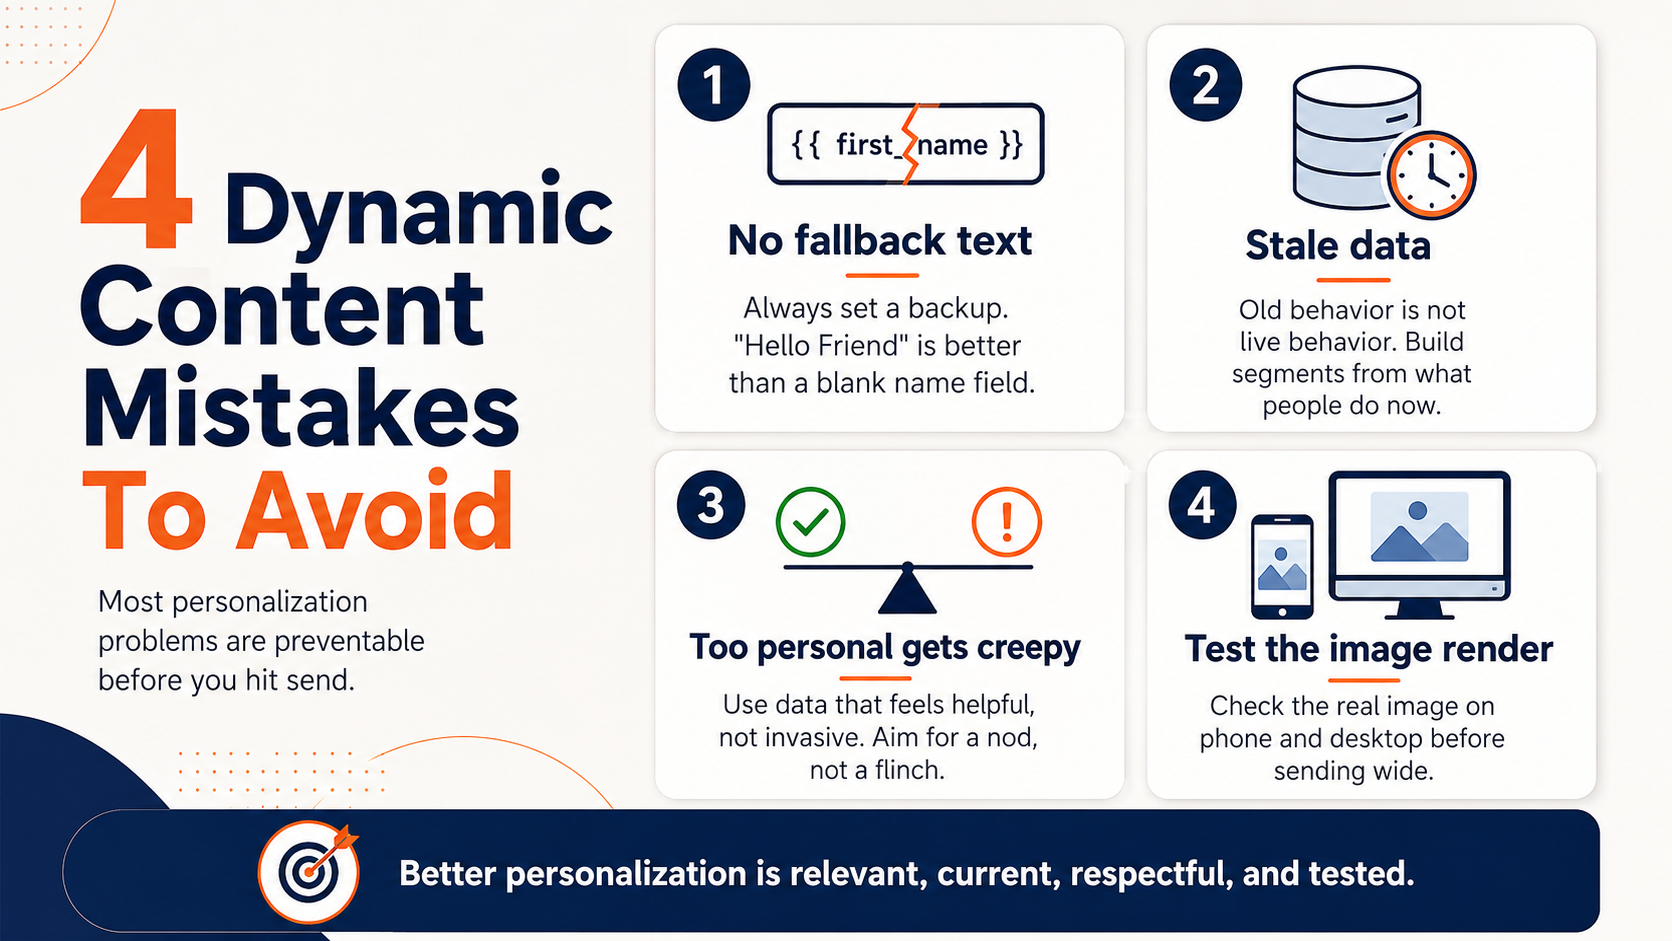
Common Dynamic Content Mistakes to Avoid
Dynamic content marketing fails in predictable ways, and most of them are avoidable before you hit send.
Personalizing without a fallback
If your merge tag pulls a first name and the field is empty, your subscriber opens an email addressed to a blank space. Always set fallback text. “Hello Friend” beats “Hello ,” every single time.
Treating stale data like it is live
A segment built from behavior six months ago is really just a guess wearing a personalization costume. If someone’s habits changed and your data didn’t, the “personalized” message is now wrong in a way a generic one never would have been.
Your segments need to reflect what people are doing now, not what they did when they signed up.
Over-personalizing until it gets creepy
There’s a line between relevant and unsettling. Referencing a recent purchase feels helpful. Referencing something a subscriber never told you they did feels like surveillance. Stay on the useful side of that line.
A good gut check is whether the subscriber would nod or flinch. “Here’s a refill for the product you bought last month” earns a nod. “We saw you looking at this three times” earns a flinch, even when both are technically accurate. Use the data that makes someone feel helped, not tracked.
Forgetting to test the image render itself
A personalized image is still an image, which means it can break in ways plain text never does. A slow-loading file, a broken URL, or a merge tag pasted with the full HTML block instead of the clean link all produce the same result, a subscriber staring at a grey box where your offer should be.
Test the actual render, not just the copy. Open the email on a phone and on desktop before it goes wide.
Pro Tip: Send yourself a test with an empty profile before every dynamic campaign. If the fallback breaks, you’ll catch it in your own inbox, not your customer’s.
What can you do with NiftyImages and Pinpointe?
With Pinpointe and NiftyImages, you can create personalized email content with real-time data. The most common applications are:
Creating a personalized image
You can upload an image, create your own, or choose a template. You can upload your brand fonts to stay on-brand, add text, and enter Pinpointe-specific merge tags to deliver a personalized message to every subscriber.
Designing a countdown timer
NiftyImages has ready-to-use countdown timers that you can incorporate into an image too. Create an image, add a subscriber’s name, and include a personalized countdown clock that starts when an email is opened.
Some recommended uses for this are to countdown to an upcoming event, a sale, or an exclusive offer.
Personalize an email to include any real-time data
You can also personalize an image with any kind of real-time data. For example, a personalized image could show a customer’s loyalty points, app usage, or viewing habits. The possibilities are only limited by the data you collect.
7 Examples of Personalized Image Ideas
To showcase some of the awesome images you can create, we’ve put together a collection of some of the most creative uses.
Send product recommendations
Amazon is famous for its product recommendations, and other brands are jumping on the suggestion bandwagon. With NiftyImages, you can create a product recommendation like this:
Customers who click on a product suggestion are 5.5 times more likely to purchase than those who don’t click.
Bottom line? Product recommendations can increase your sales revenue.
Promote an upcoming sale
Planning a sale? Why not let your customers know about it with a personalized invitation? Take a look at this example with the subscriber’s name, Kevin, on the top and a 15% off coupon.
Show users their individual usage
Show customers just how much they use an app with a personalized snapshot of their account. Flickr, for example, created this personalized image. Note the user’s image and name at the top, personalized statistics, and his most popular photo showcased. (Now that’s personalization at its best).
Give users a nudge to finish setting up a profile
Do you want customers to create a profile on your site? If so, you can create a personalized image like this:
About 46% of consumers say they like to create online accounts to ease their checkout process, but others say they’re hesitant to create an account. What’s stopping them? Some say they’re worried the process will take too long.
By sending this kind of image, the subscriber knows how much of their profile is created and how much is left to go.
Bring back lost customers
Research shows just under 50% of customers leave an email list within a year of signing up. To try and retain customers, why not send a personalized email to subscribers when they become inactive?
Something like this might work:
Send a birthday message
Birthday emails are surprisingly effective. Research shows birthday emails have a higher transaction rate than a generic promotional email. With this kind of lift, it’s not surprising to see why more marketers are sending a tailored message to customers on their big day.
With NiftyImages, you can create an image like this:
The image will be the same for every customer, but the name will change. With the help of triggered email campaigns, this image can be delivered to customers on their birthday. The image can even be altered to include a special birthday promotion or coupon.
Send customized reminders
People are busy. To help remind them of important tasks, send a personalized image like this one:
How to create a personalized image with NiftyImages and use it in a Pinpointe email campaign
Wondering how to create and send dynamic images of your own? We’ll show you. You can also learn how to create a personalized image for your next Pinpointe email campaign by watching the video below:
1. Open Pinpointe and NiftyImages
To get started, you’ll need both a Pinpointe account and NiftyImages account.
Don’t have them? Schedule a demo with the Pinpointe team here. You can sign up for a free NiftyImages account here.
Once you’ve signed up, open each program in two separate tabs.
2. Create an email with Pinpointe’s Drag and Drop Email Builder
In Pinpointe, go to Email Campaigns -> New Campaign. Select the Drag and Drop Campaign Builder and find a template you like. Name the template and click Create. For our example, we picked the template below and plan to replace the top image with our personalized NiftyImage.
3. Make a plan
Where do you want the personalized image to go? How will it work with the rest of the email? Take a minute to create a plan. For this example, we’re going to replace the bridge image with a personalized image that gives subscribers at 15% off coupon.
4. Go into your NiftyImage account and upload an image
In NiftyImages, click the pink button, “Create Image, Timer, or Data Source” and click “Personalized Image.” Next, you’ll upload the image you want to work with.
If you plan to work with an image from a stock photo site, you’ll probably need to compress the image. Remember, large images take time to load, so compressing it guarantees the picture appears when the email is opened. Try a free online compression tool like CompressJPG or TinyJPG.
When the image is uploaded, NiftyImages might ask if you want the image to be resized to work with it. Say yes.
Once an image is uploaded, it will appear in the NiftyImages builder like this:
From here, you can make changes to your images. We’re going to add personalized text to the shopping bag. The bag will read, “[Name], Are you ready to save 15%?”
The name is dynamic, so it will change based on the subscriber who opens the email. The rest of the message, “Are you ready to save 15%?” is static. It won’t change. We’ll add the static text first.
5. Add static text
The text, “Are you ready to save 15%?” will not change. To add it to your image, click on Text on the toolbar on the left. Write the words you want in the text box on the left side. Move the text box to the place you want it.
From this same spot, you can manipulate the text. You can change the font, color, and justification.
6. Add the personalization
With text added, go to Add Element, and then click on Merge Tag Layer. Merge Tag Layer allows you to add dynamic content. In this case, the dynamic content is the subscriber’s first name.
When you select Merge Tag Layer, you’ll see default merge tags that are already included, but you need to create your own so click on “Add or Edit Merge Tags.” You’ll be asked for Merge Tag, Fallback text, and a Design Value.
Merge Tag
The Merge Tag names the personalized information you want to add. If you want to add a person’s first name, you’ll put firstname in this field. For our purposes, we’re adding a firstname.
Fallback text
Your email list likely includes a contact or two that doesn’t have a first name on file. If the information is missing, the fallback text will appear instead. In our example, if we can’t use a person’s first name, we’ll use the fallback text “Hello Friend.” If a person’s first name is unknown, the message will read, “Hello Friend, Are you ready to save 15%?.”
Design value
The design value is a piece of text that you’re using for design purposes. You can enter your own name, for example.
With all three of these fields filled in, click Next. You’ll be taken to another screen that asks for Tag Type, Text Casing, Minimum Character, and Maximum Characters.
Tag type
The tag type is either text or a number. For our purposes, we’ll select text.
Text casing
This determines how your text looks. You can choose no casing, title case, uppercase, or lowercase.
Minimum characters and Maximum characters
Set the minimum characters to 0 and the maximum characters to 15, since that’s about how many letters will fit across the screen.
Once you fill those in, click Next. You’ll see one final screen that deals with merge tags, and it’s an important one.
It asks for the ESP Merge Tag and has a button that asks if you want to save the tag for future use. You must enter the correct merge tag. Without entering a Pinpointe-specific merge tag, your personalization will not work.
In our example, we’re adding a person’s first name so the graphic reads, “Pam, Are you ready to save 15%?” To get the subscriber’s first name to appear, we need to put in this Pinpointe-specific merge tag: %%First-Name%%.
Of course, you may want to create a different image with a different piece of personalized information. Every piece of information has its own merge tag. Refer to the list below to enter the correct merge tag based on what you want to personalize.
Pinpointe merge tag guide
- First name: %%First-Name%%
- Last-Name: %%Last-Name%%
- Company: %%Company%%
- Industry: %%Industry%%
- Title: %%Title%%
- City: %%City%%
- Country: %%Country%%
You can create any custom field (merge tags) in Pinpointe by simply enclosing the information with the ‘%%’ characters.
Once the ESP merge tag is added and the button to save the tag is flipped to green, click Save.
Next, you’ll position the dynamic text where you want it in the editor.
7. Save your image
When you’re done with your image, click Save in the top right corner. You’ll be prompted to give your image a name. Add a name and click Save.
On the next screen, you’ll see a line of HTML code.
You can also see a live preview of your image as well.
Now we need to use put the image into a Pinpointe email.
8. Add image to Pinpointe email template
Bounce back to your Pinpointe tab. You already have a template pulled up. We’ll replace the top image with the one made with NiftyImages.
To add the image to the email template, copy the URL that was given to you by NiftyImages. Be careful, you’re only looking for the URL, not the entire piece of code. NiftyImages supplied this piece of code:
https://img1.niftyimages.com/82v/wwco/hwqd?firstname=%%First-Name%%” />
All you need is the URL, which is in between the “” and highlighted in red.
With the URL copied, click on the image in the email template that you want to replace. Now go to the toolbar. On the left side you’ll see a box that says, Image URL (Red box below). Paste the URL in that box and hit enter.
You should see a preview of your image with the personalization tag like this:
If you see a grey screen with the word “Placeholder” on it, you’ve likely pasted the entire HTML code and the image won’t work. Make sure you’ve only copied the URL.
You might also want to add a link to the personalized image as a call to action. To do so, add the link to box labeled “Link” on the toolbar. In the image below, it’s the bottom red box.
9. Send a test email
Once the image is in the template, edit the rest of the email to your liking and save it. Before you send this email out to your customers, you should send yourself a test email to make sure the personalization worked. Here’s an example of the test email in an inbox.
10. Send the email to customers
With the email tested and ready to go, it’s time to send the campaign to a larger database of customers.
Turn Data You Already Have Into Emails That Feel One-to-One
Most teams already sit on the subscriber data they’d need to personalize well. What trips them up is follow-through, the system that pulls that data into the send automatically, on every subscriber, without someone rebuilding a list by hand each week.
With Pinpointe, your segments update in real time as behavior shifts, and the right message fires off the actual signal, a click, a browse, a stretch of silence, instead of waiting on a scheduled batch. Paired with a personalized NiftyImage, that means the coupon, the win-back, and the birthday note all reflect what a subscriber is doing right now.
Put Your Subscriber Data to Work on the Next Send
You now know what separates a personalized email that gets clicked from a generic one that gets deleted. Dynamic content earns the read by being relevant.
Segmentation makes sure that relevance lands with the right person. And a tool like NiftyImages lets you build the image without touching code, while Pinpointe decides who sees it and when.
The brands winning the inbox aren’t sending more email. They’re sending email that reflects what they already know about the people receiving it.
See where your own program stands. Schedule a marketing automation audit, and we’ll show you exactly where your subscriber data could be doing more work than it is today.